
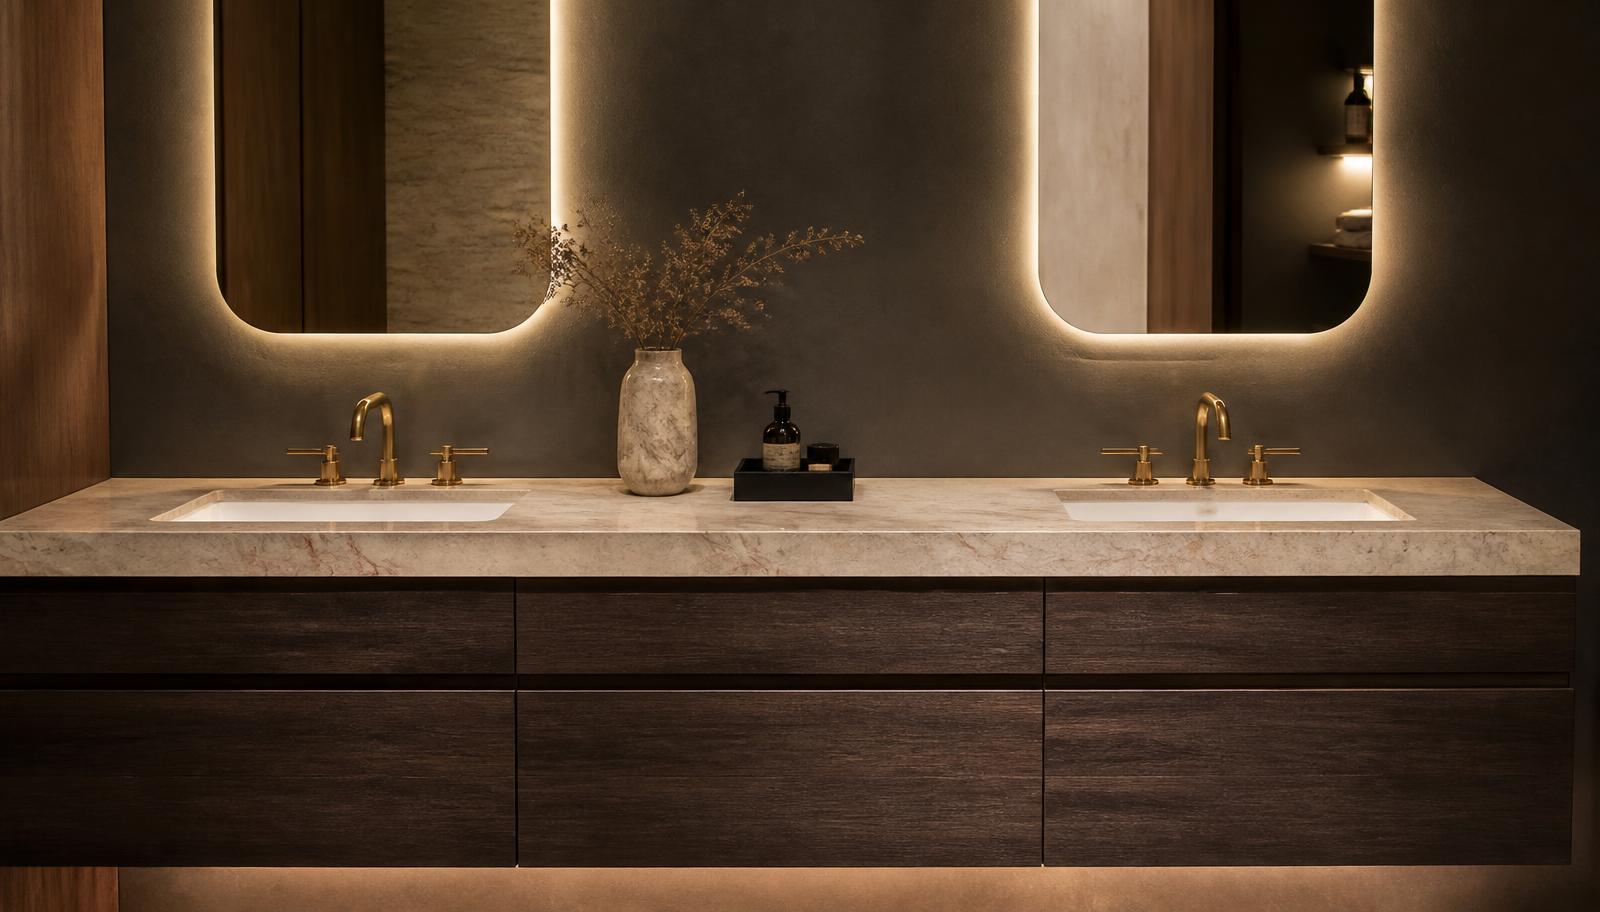
Vanity & Fixture Upgrades · Salt Lake City
Vanity & Fixture Upgrades for Salt Lake City's Older Homes
In a five-by-eight Avenues bathroom or a Sugar House bungalow, an inch of vanity depth is the difference between a room that works and one that doesn't. We design and build to that reality.
Salt Lake City bathrooms are, more often than not, small on purpose. Homes built between 1900 and 1940 in the Avenues, Capitol Hill, Liberty Wells, and Sugar House were laid out when one bathroom served an entire household and floor space was precious. The result is a vanity wall with almost no margin for error. A cabinet that is two inches deeper than the one it replaces can close off a door swing or crowd a tub. In this city, vanity and fixture work is a measuring exercise before it is a design exercise.
The second reality is what is inside that wall. Plumbing in pre-war Salt Lake City homes was frequently run through exterior walls, because the bathroom sat at the back corner of the house where the kitchen stack was already climbing. That means a supply line sitting a few inches from uninsulated brick or lath, exposed to every hard freeze the valley gets each winter. It also means galvanized pipe that has been narrowing from the inside for decades, which shows up as weak flow at the faucet long before anyone thinks to blame the pipe.
The third reality is the wiring. A great many of these bathrooms still run on a circuit shared with a bedroom, protected by nothing more than the original breaker, with no ground at the outlet box. Homeowners often want a backlit mirror or better vanity lighting and are surprised to learn the box behind their existing fixture cannot support it safely. None of this makes a vanity upgrade in Salt Lake City more complicated than it needs to be — it just means the plan has to account for what a century-old wall actually contains, rather than assuming it looks like a 1998 tract home.
Why the vanity wall is the highest-leverage change in these homes
A pre-war Salt Lake City bathroom rarely has room to change its footprint. The tub sits where it has always sat, the door swings where it has always swung, and moving either one means opening framing that was never meant to move. The vanity wall is different. It is usually the one surface in the room where genuine redesign is possible without touching structure, because it is furniture bolted to a wall rather than a fixture cast into the floor.
That is exactly why it carries so much visual weight. Walk into most of these bathrooms and the vanity is the first thing you see and the last thing that gets updated, because previous owners spent their renovation budget on the shower or the floor and left a builder-grade cabinet in place for thirty years. Replacing it with a cabinet sized correctly for the room, a counter that actually fits the wall length, and lighting that does its job changes the character of the entire space more than almost any other single move.
It is also the fastest way to add function to a bathroom that cannot get any bigger. Storage is chronically short in these homes — there was no linen closet built into a 1920s floor plan, and the medicine cabinet was often the only storage the room ever had. A vanity designed around drawer capacity rather than a single door and a shelf can absorb what used to live on open shelving or a nightstand crammed in the corner.
Because the room is small, mistakes are magnified. A counter half an inch too deep will hit the door casing. A cabinet with doors that swing the wrong way will collide with a towel bar. Getting this piece right in a Salt Lake City bathroom requires the same attention to millimeters that a boat builder gives a galley, and that is the standard we hold the work to.
- The vanity wall is usually the only surface that can be genuinely redesigned
- Correctly sized cabinetry recovers storage the original floor plan never had
- Small margins mean every dimension has to be checked against the room, not a catalog
What can be swapped and what needs the wall opened
A straightforward like-for-like swap — same footprint, same basin position, same faucet configuration — is genuinely quick in these homes, because it does not disturb anything behind the finish surface. If your existing vanity sits on sound plumbing with valves that still shut off fully, replacing the cabinet, counter, and faucet can often be done without opening the wall at all.
The moment the plan changes basin position, adds a second basin, or moves to a floating cabinet, the wall has to come open, and in a pre-war home that almost always reveals something. Old solder joints on galvanized-to-copper transitions, lath-and-plaster backing that will not hold a modern anchor, or a stud bay that has already been notched by a previous remodel are common finds. We treat that as the expected condition rather than an unwelcome surprise, and we build an allowance into the estimate rather than pretending the wall will be clean.
Electrical is the other frequent trigger. If you want a backlit mirror, side sconces, or simply a grounded outlet at the counter for a hairdryer, the existing box and circuit usually cannot support it as-is. That means running new cable back to the panel, which in a home with plaster walls and no accessible chase can mean opening a channel in the wall or running through the attic and down through the wall cavity. It is worth doing once and doing correctly rather than tapping into an already-loaded circuit.
Floating vanities deserve a specific note in this housing stock. They look excellent in a tight pre-war bathroom because they visually enlarge the floor, but they require real blocking between studs that was never installed for a floor-standing cabinet, and they require the plumbing pushed back into the wall so nothing hangs below the cabinet face. Both are achievable in an older wall, but only once it is open.
- Like-for-like swaps on sound plumbing rarely require opening the wall
- Moved basins, added basins, or floating cabinets require opening the wall to plan properly
- New lighting circuits or grounded outlets almost always require new cable run to the panel
Cabinetry and storage design for a narrow footprint
In a room this size, cabinetry has to be specified to the actual wall length rather than to a standard width. We measure the swing of the door, the position of the towel bar, and the clearance to the tub before selecting a cabinet, because a two-inch miscalculation in either direction changes whether the room feels comfortable or cramped. Semi-custom cabinetry earns its keep here, because it lets us choose the exact width and drawer configuration the wall allows rather than rounding to the nearest stock size.
Drawer storage is almost always the right call over doors in these homes, because a single-door cabinet with a shelf interrupted by the waste trap wastes most of its own volume. A well-designed drawer box built around the trap, with a false front on the lowest drawer that still opens for cleaning supplies, recovers storage that this housing stock simply never had. For households sharing one bathroom, that reclaimed storage is often the single most appreciated outcome of the project.
Floating cabinetry, discussed above, is worth strong consideration specifically because these bathrooms are visually compressed by low ceilings and narrow widths. A floating vanity with the floor visible beneath it reads larger than a floor-standing equivalent, and it simplifies mopping a floor that in many of these homes is original hex tile worth protecting.
Where a linen closet does not exist, a tall narrow cabinet beside the vanity — even a foot wide — can absorb towels and toiletries that would otherwise sit on open shelving. We look at the whole wall, not just the basin footprint, before finalizing a layout.
- Cabinetry sized to the exact wall, door swing, and towel bar clearance
- Drawer storage built around the waste trap rather than a single obstructed shelf
- Floating cabinets to visually enlarge a compressed pre-war floor plan
- A slim tall cabinet where no linen closet was ever built into the plan
Counters, basins, and the hard-water reality
Salt Lake Valley water is hard, and it does not treat every counter and basin material the same way. Quartz handles it without complaint — it is non-porous, does not need sealing, and shrugs off the mineral deposits that build up around a faucet base. For a bathroom that gets daily use and infrequent deep cleaning, that low-maintenance profile is usually the right call.
Natural stone is beautiful in these older homes and suits the character of the house, but it requires honesty about upkeep. Marble in particular will etch where hard water sits and dries, and where household cleaners touch it. That is not a flaw to hide, it is a material choice that develops a patina over time, and it should be chosen because a homeowner wants that look, not discovered as a surprise a year in.
Basin choice interacts with the small counter depth typical of these homes. An undermount basin set close to the front edge of a narrow counter keeps usable counter space in front of the basin for the daily routine, which matters more in a twenty-inch-deep counter than a thirty-inch one. Vessel basins look striking but consume vertical space that a low pre-war ceiling and a shallow mirror wall may not have to spare, so we consider ceiling height and mirror position before recommending one.
Faucet height relative to basin depth is worth checking carefully in these rooms specifically because older basins were often shallower than modern ones. Pairing a tall faucet with a shallow basin causes splashing that a homeowner will notice every single day and blame on the faucet rather than the mismatch.
- Quartz for low-maintenance durability against hard water
- Natural stone as a deliberate choice, with etching and patina understood up front
- Undermount basins to preserve usable space on a shallow pre-war counter
- Faucet height checked against basin depth to prevent splashing
Faucets and valves where the pipe behind the wall is decades old
We treat shut-off valve replacement as standard practice on any Salt Lake City vanity project, not an upsell. Original valves in homes of this age frequently do not close fully, having sat untouched for decades, and a faucet swap that starts as routine work becomes a flooded cabinet base the moment the old valve fails to shut. Replacing valves and supply lines during the same visit removes that risk for a modest cost.
Faucet finish matters more here than most homeowners expect, precisely because of the hard water. A highly polished chrome or nickel finish will show water spots within a day of cleaning, which in a bathroom used every morning becomes a losing battle. Brushed and satin finishes hide those spots dramatically better and are the finish we recommend by default in this region, reserving polished finishes for households who genuinely enjoy the maintenance ritual.
Parts availability deserves a mention specifically for older homes being updated in stages. If a previous owner installed a faucet from a manufacturer that has since discontinued the cartridge, the whole faucet needs replacing rather than a simple internal repair down the line. We favor manufacturers with a long track record of maintaining parts supply, because a faucet that can be serviced in ten years is worth more than one that looks marginally better today.
Where a wall-mounted faucet is being considered to save counter space in a narrow room, the rough-in position must be finalized before the wall is closed, since correcting it afterward means reopening finished tile or drywall.
- Shut-off valve and supply line replacement as standard practice on original plumbing
- Brushed and satin finishes recommended for hard-water practicality
- Faucet brands chosen for long-term cartridge and parts availability
- Wall-mounted faucet rough-in finalized before the wall closes
Lighting, mirrors, and the electrical work behind them
Original vanity lighting in these homes is almost always a single fixture centered above the mirror, which casts a shadow down across the face — the least useful lighting arrangement for shaving or applying makeup. Adding sconces at either side of the mirror, at roughly face height, solves this properly, but it requires a circuit capable of supporting the additional load and a wall that can be opened to run cable to that position.
Because so many of these bathrooms still run on old, sometimes ungrounded, circuits shared with an adjacent room, we assess the panel and existing wiring honestly before promising a specific lighting layout. In some homes the correct answer is a dedicated new circuit run from the panel; in others the existing circuit has enough capacity once GFCI protection is brought current. Either way, this gets resolved during the estimate rather than discovered mid-installation.
Mirror size in these rooms is constrained by a lower ceiling and a shorter wall than a modern bathroom, so we size the mirror to the vanity width rather than defaulting to a size that suits a larger room. Any mirror of meaningful size needs blocking behind the plaster or drywall, which in an older home usually is not present and needs to be added while the wall is open for the electrical work anyway — a good example of two trades sharing one opened wall rather than two separate disruptions.
Backlit and anti-fog mirrors are popular requests, and they are achievable here, but they add to the electrical scope discussed above. We size that into the plan early so it is not a late addition that forces reopening a wall that was already closed.
- Side sconces at face height instead of a single shadow-casting overhead fixture
- Panel and circuit assessed honestly before committing to a lighting layout
- Mirror sized to the actual vanity width and wall height, not a standard dimension
- Blocking added while the wall is open for electrical work regardless
Ventilation, permits, and timeline in the city
If the exhaust fan is being touched as part of this project — which is common when a wall is already open for plumbing or electrical work — we take the opportunity to verify it terminates outside rather than into an attic space, a shortcut we still find in these older homes. Salt Lake's dry climate can mask a poorly vented fan for years before moisture problems show up in the paint, and a vanity project is a natural point to correct it.
Permitting in Salt Lake City is triggered by scope rather than by the size of the project. A cosmetic like-for-like swap generally does not require one. Adding or relocating plumbing, adding electrical circuits, or altering framing for a floating vanity typically does. Because vanity projects in this housing stock frequently involve one of those triggers, we plan for permitting as the default rather than the exception, and we handle the application and inspection scheduling directly.
Homes within the Avenues or Capitol Hill historic districts add a layer worth flagging early: interior work is generally outside historic review, but any new exterior vent penetration on a street-facing wall can fall inside it. We route new ducting with that in mind rather than discovering the issue at inspection time.
Timeline for a straightforward swap in this housing stock typically runs a few working days once materials are on hand. Where plumbing is relocated or a wall is opened for electrical work, expect the project to extend to include wall repair, and where a stone or quartz counter is templated, add one to two weeks for fabrication between cabinet installation and the final counter fit.
- Fan termination verified and corrected where it currently vents into the attic
- Permits planned as the default given how often plumbing or electrical is touched
- Historic district review considered for any new exterior vent penetration
- Straightforward swaps run days; opened walls and templated counters extend the schedule
What drives cost in a Salt Lake City vanity project
The largest cost variable in this city's older homes is the condition of what is found once the wall opens. A galvanized supply line that needs a repiped section, a waste trap that needs relocating for a new basin position, or plaster backing that will not hold blocking all add real, necessary work. We build a contingency conversation into the estimate from the outset specifically because of how often something of this kind turns up in pre-war construction, and a project where nothing is found simply finishes under that contingency.
The second driver is electrical scope, because so few of these bathrooms have the circuit capacity or grounding that current lighting expectations assume. A simple fixture swap is inexpensive; adding a dedicated circuit, GFCI protection, and side sconces is real work that involves opening the wall and running new cable, and it is worth pricing honestly rather than folding it into a vague allowance.
Cabinetry customization is the third factor, and in this housing stock it is rarely optional in the way it might be in a newer home with standard dimensions. Semi-custom sizing to fit an odd wall length costs more than a stock cabinet but avoids the compromises — a door that will not fully open, a counter that overhangs awkwardly — that come from forcing a standard size into a nonstandard room.
Finally, access and disruption. Many of these bathrooms sit on a second floor reached by a narrow original stair, which adds labor time to demolition and material delivery that a ground-floor bathroom would not incur. We account for this directly in the estimate rather than treating it as a hidden add-on.
- Condition of plumbing and framing discovered once the wall opens
- Electrical circuit capacity and grounding brought current for new lighting
- Semi-custom cabinetry sizing for nonstandard pre-war wall dimensions
- Access via narrow original stairways in second-floor bathrooms
More of what we do in Salt Lake City
Bathroom renovation in Salt Lake City
Housing stock, permitting, and conditions across the area.
Shower Replacement in Salt Lake City
Walk-in, curbless, and frameless glass showers built on a sound waterproof assembly.
Bathtub Replacement in Salt Lake City
Alcove, drop-in, and freestanding tubs set level, supported, and properly drained.
Full Bathroom Remodel in Salt Lake City
Back-to-studs renovation covering layout, structure, services, and finishes.
Flooring in Salt Lake City
Bathroom floors built from the substrate up, with heated flooring planned in.
Accessibility Modifications in Salt Lake City
Curbless entries, anchored support, and safe layouts that still look like good design.